| HOME ABOUT APHEX CABLES CRYSTAL FREQ CHART SURROUND TEST CD WHITE PAPERS PROJECTS |
| Project 679 Fantastic DIY subs, Gorgeous DIY acoustic panels, DIY diffusor, and... KEF LS-50's !!! |
| xx | 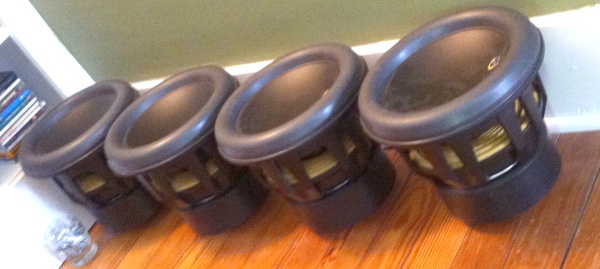 |
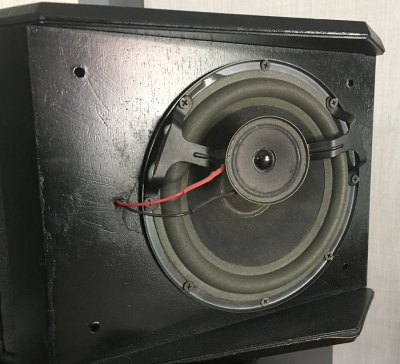
| The amazing JL Audio 10W7 drivers |
THE CUSTOMER PREMISE
My buddy Ben called me up one day at JL Audio Home Products Tech Support, which I ran for 8 years. He had 4 x JL Audio 10W7 Anniversary Edition drivers that were going to go in a truck, but now he had the idea to build his own DIY sub cabinets for his living room. Another DIY project! The good projects really stand out!
He had a combination Home Theater and mostly 2-channel setup. So he was starting with the subs part.
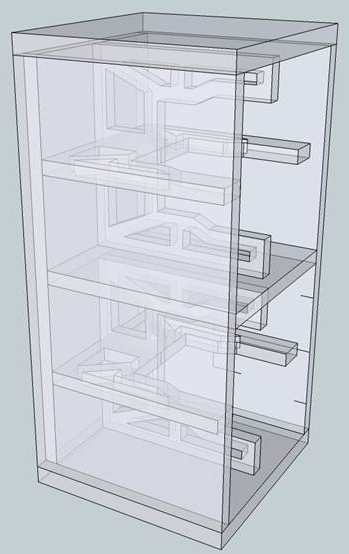
So he wanted to build cabinets. Here's my dirt-simple suggestion: You take the fabulous JL Audio f212 cabinet and shrink it down 12%. (the sizes x .88)
|
|
| The custom dual 10" sub cabinet | |
THE SUBS
So this is not EXACTLY rocket science, but it is WAY past my own expertise in woodworking capability! I genuinely admire those artisans who are capable of taking what to me is a difficult substance (wood) and making it into a piece of art!
These are sealed cabinets of course. NEVER USE PORTED CABINETS IN A LIVING ROOM! Plus you MUST seal the ports, if any, in your mains, so at the crossover region there is no integration sloppiness and you wind up with a CLEAN impulse response. THIS IS THE KEY to clean and tight and focused bass.
These cabinets are glued and screwed and crazy strong braced as you can see. When they are playing there is no perceivable vibration. I can't remember how much they weigh, but they weight a LOT. (The drivers alone are 60+ pounds in each cabinet) There are feet but NO annoying (and completely unnecessary) "spikes". The subs are sitting on the wood floor. The carpeted area doesn't start for a couple of feet more into the room.
Since the drivers are 3 ohms the simple answer is to put the two in each cabinet in series and that makes a VERY comfortable ~6 Ohm load for any amp that will drive 4 ohms per side. EASY! He chose a QSC PL 380 which will easily supply 1800 watts+ PER SIDE. At clean melt your brain levels it simply sits there, loafing along. In this instance the amp is connected 240V; therefore the load is distributed ACROSS the two 120 v legs of the power line, so no dimming lights on one leg even on insane peaks.
The REST of the system is clean, direct and again, DIRT SIMPLE. His (WONDERFUL) Emotiva XMC-1 is crossed over at 100 and the sub out goes to the QSC. PERIOD. No complex EQ, no nothing. It's just "THERE".
The wire length isn't very far; the #10 stranded wire goes down through the floor into the basement and back up behind the subs.
 |
| JL Audio 10W7 AE |
Just for your edification, here's the
JL Audio 10W7 Anniversary Edition.
It weighs 30 pounds, and has a VERY long throw.
Pretty much every other 10" low freq driver is kind of a
toy in comparison,
although there have been some recent attempts at making HUGE car drivers.
THE SUBWOOFER PHASE ADJUSTMENT
Since the sub amp is a "real" amp, and there is no actual "PHASE" adjustment control, you have to improvise. And this procedure works with any sub which is foolish enough to not have a variable phase adjustment. Be aware that SOME subs have an incorrectly labelled "phase" toggle switch labelled 0 - 180. That is NOT PHASE, IT IS POLARITY. With regular subs intended for home use (JL Audio, SVS, M&K, etc) they usually have BOTH a variable Phase Knob and a Polarity Toggle Switch.
First you set ALL the
distances in the Home Theater Receiver/Processor to 7 feet where they
belong.
Then you take the Left or Right main speaker that is closest to the sub and flip it's wiring polarity over.
Now you feed in a sine wave AT THE CROSSOVER FREQ. And this is one of the few times you can use an SPL meter to assist you; you hold the meter separately a few inches in front of the mains and a few inches in front of the sub (with only one on at a time) and set their levels to be the same. I SUGGEST leaving the Sub Level at so-called "0" and change the mains level in the preamo or processor.
Here's the trick: you are going to sit AT the sweet spot, and walk the subwoofer distance UP 6" or 1 foot at a time, until it nulls. If the sub is a simple power amp connection like this without 5-stages of EQ (like a commercial sealed sub) then the distance will probably be fairly close to "the same". You are compensating for the sub's inherent group delay by delaying the tops to match. Therefore a musical IMPULSE, at or near the crossover frequency, arrives at your ears correctly whether the sound is leaving the sub or the mains or both.
Be aware that since all consumer equipment operates backwards, when you increase the SUB's DISTANCE SETTING you are adding delay to all the OTHER speaker channels! (the tops, e.g. L C R Ls Rs Lb Rb ) Once you get the null leave the settings there and flip the main speaker wiring back to the correct, normal position.
If you have 2 subs and they are different distances from the mains you should do this adjustment separately for each sub and the main it is closest to.
 |
a |
Here's the dress plate on the left There was a concern that it might vibrate but it doesn't seem to at all. I have stepped it up 1 cycle at a time from 15 to 150 Hz to discern any vibrations. If you want to
try this with your system here is THE cool app: Diapason
AG. The Revels have since been sold. In the interim, he experimented with a number of other mains... |
b | 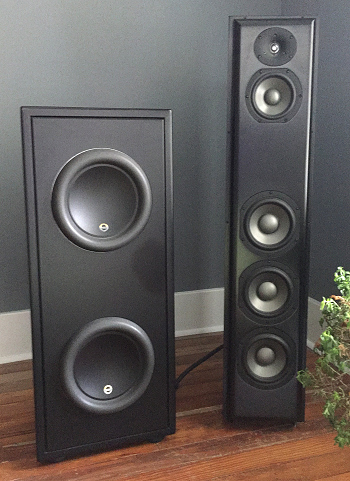 |
| The dress plates | The 'early' Revel mains |
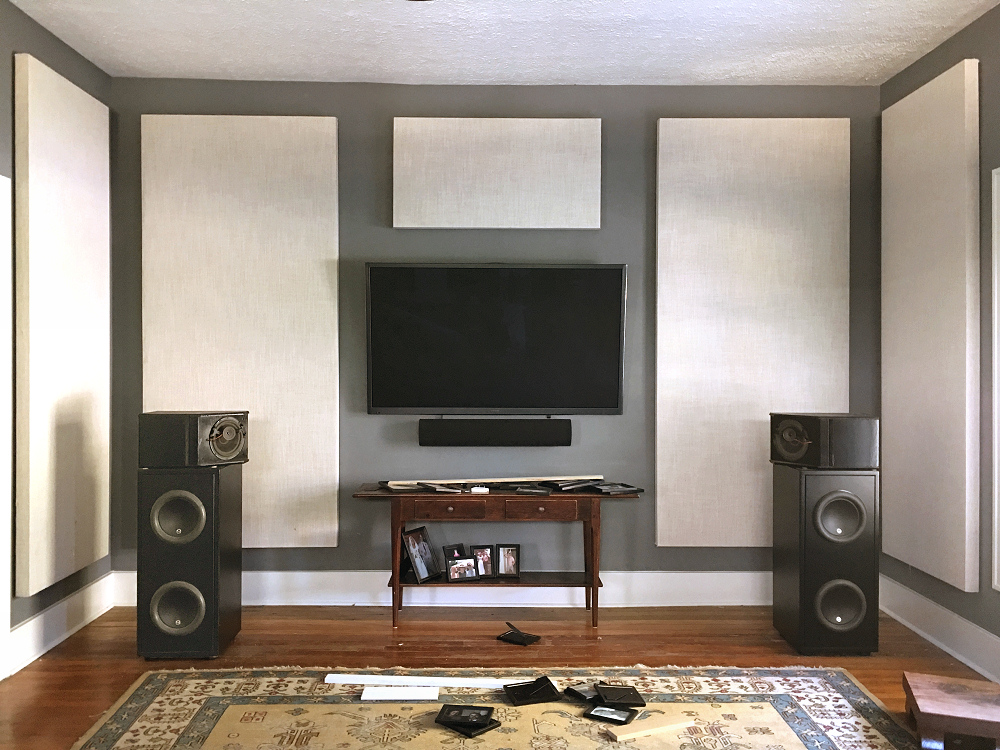 |
| Nearing completion! The acoustic panels are described below. |
 |
aa |
| Don't laugh. |
THE MAIN SPEAKER EXPERIMENTS
When he sold his mains, and was experimenting with other speakers before deciding... he got these $30 "Yard Sale" Bose.
OK, you audiophiles, they are VERY FUNNY.
The fact that you can get anything out of a very toy looking 80 cent tweeter is, well, remarkable. But crossed over at 90 or 100, so that LF driver isn't being stressed, and with the acoustic treatment in the room (as explained below) it was surprisingly acceptable.
Soon there will be pix of the latest "main speaker" addition - the KEF LS-50's.
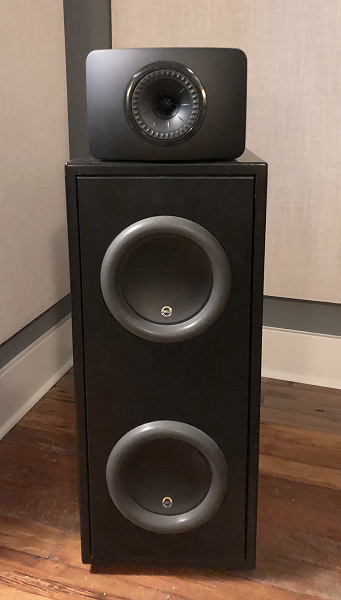 |
| Woo Hoo! The new KEF LS50's ! |
And here it is now!
The first pix of the new KEF LS-50's on top of the DIY subs.
These are the Limited Black edition.
Hopefully there will be more pix soon!
ONWARD TO ACOUSTICS
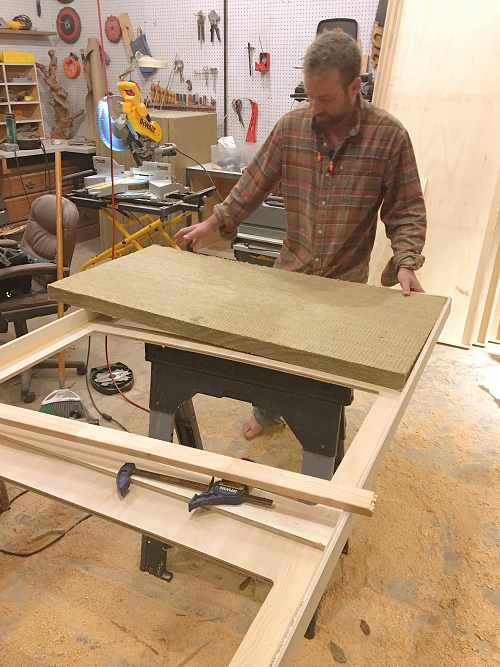
Ben always wanted to experiment with acoustics. The room by itself certainly wasn't bad, but we decided to experiment. Since Ben is such a great craftsman, he / we made these plywood panels to hold the always suggested Mineral Wool.
 |
dd |
| Fitting the mineral wool |
So the 2" mineral wool was cut on a table saw. The edges were painted with Pliobond, and the inside edges of the wood frame also gently painted, then the material is pressed into place. Pliobond has a perfect working time, plus you get a nice buzz... When it really dries in about an hour it is very strong. Another reason to use it (and not annoying "spray" adhesive) is you will get the spray EVERYWHERE you DON'T want it, while the liquid Pliobond is more easily controllable.
You can use the absolute cheapest 2" paint brushes, too. But I suggest not using foam brushes; the solvent will melt them. We bought a full gallon of Pliobond. You might be able to get away with TWO quart cans.
When all the sections are inserted, you then paint the outside edge of the plywood with the adhesive and then gently and smoothly apply the acoustically transparent cloth you have chosen.
If you can blow through it then it is acoustically transparent enough to be good. You can also choose the same Guilford Of Maine (and who knows why they call it that, they are in Michigan...) acoustic cloth that everyone in the industry uses. The colors are HERE.
Not unlike wrapping a Christmas present, the corners are the hard part. By the time you figure out how to do it correctly your project is finished!
The panels are held on the wall with a 5/8" Z wood strip on top, and a 5/8" spacer near the bottom. You can then easily nudge / slide / tap the positioning left and right because putting them where you think they belong to start never looks right from the listening position perspective, because of viewing parallax.
So this was really a noble experiment. The results are amazing. What was good before is now cleaner than ever, and the imaging is assisted by the fact that the 1st reflection off the side walls is gently absorbed. It's not TOO dead, either. When you are standing in the room talking to someone yes you can hear the delicate midband absorption; it just removes a bit of the echo that would otherwise serve to define the size of the room to your mechanism of hearing. It sounds "correct".
But wait, there's more...
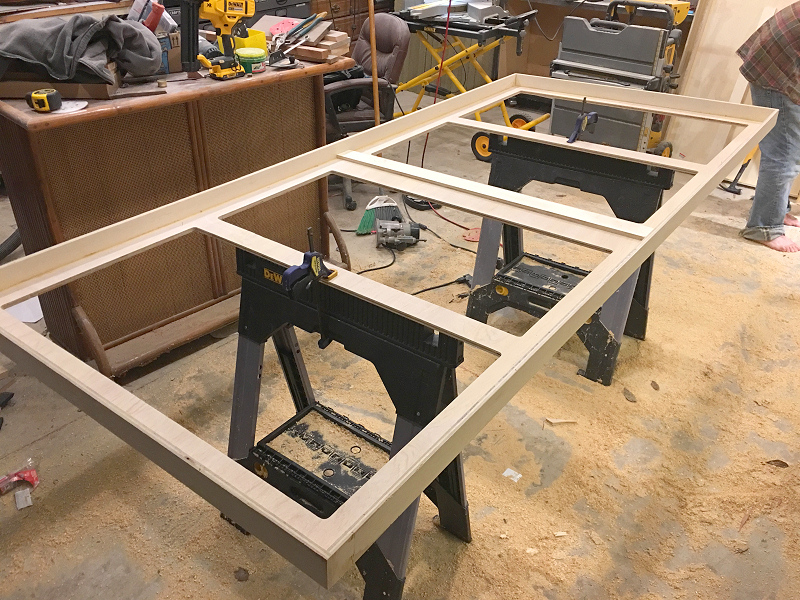 |
| The plywood forms routed out. You are looking at the front side. |
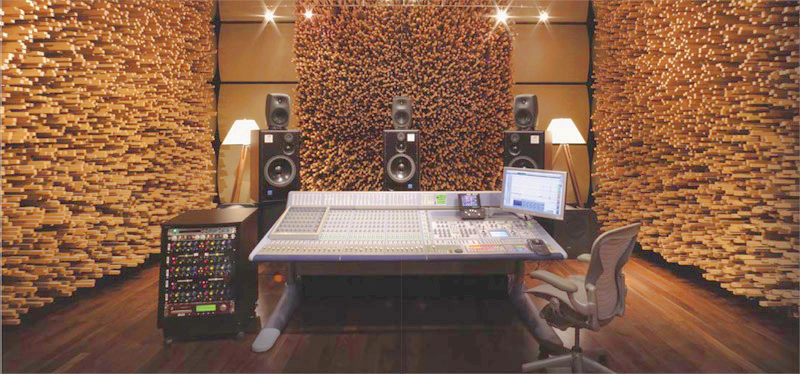 |
| The astonishing acoustics treatment at Blackbird Studios |
PS: according to John McBride, the room above has 138,646 individual pieces of wood.
| vv | 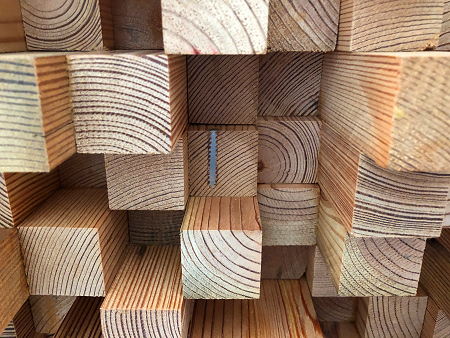 |
| A closeup of the old wood |
After seeing the ASTONISHING pix of Blackbird studios, and other pix of quadratic diffusors, Ben decided to make his own.
So here's the progress... He decided to make it while the backing plywood was ON THE WALL. The wood had some screws and nails in it so if you are going to try this be careful! Or buy fresh wood!
There are 2200 pieces (!!!). Each was glued on the back and 3 sides a little. Choosing the heights is a major science project and there are all sorts of online formulas and computations and frequency response suggestions and ways of determining just how much wood you really need and if you have hair, you will probably pull it all out figuring out exactly what goes where, and if it really matters. OTOH, you can simply make it look nice.
You could stain the wood, but you want it as porus as possible, so you would not paint it with a urethane or any 'sealer', nor use "wax" on it.
Again, this beautiful project wasn't exactly "necessary". But look how magnificent!
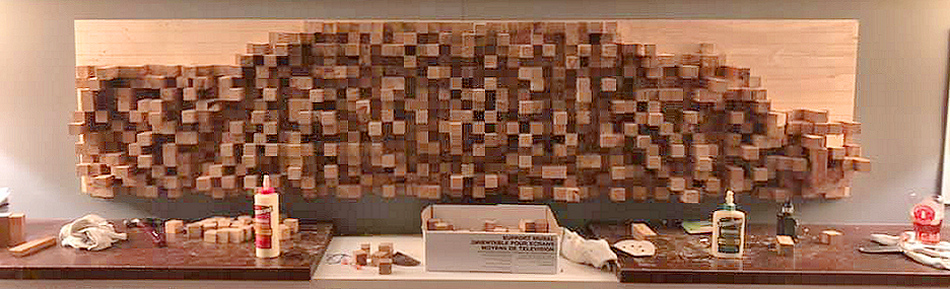 |
| The tedious construction |
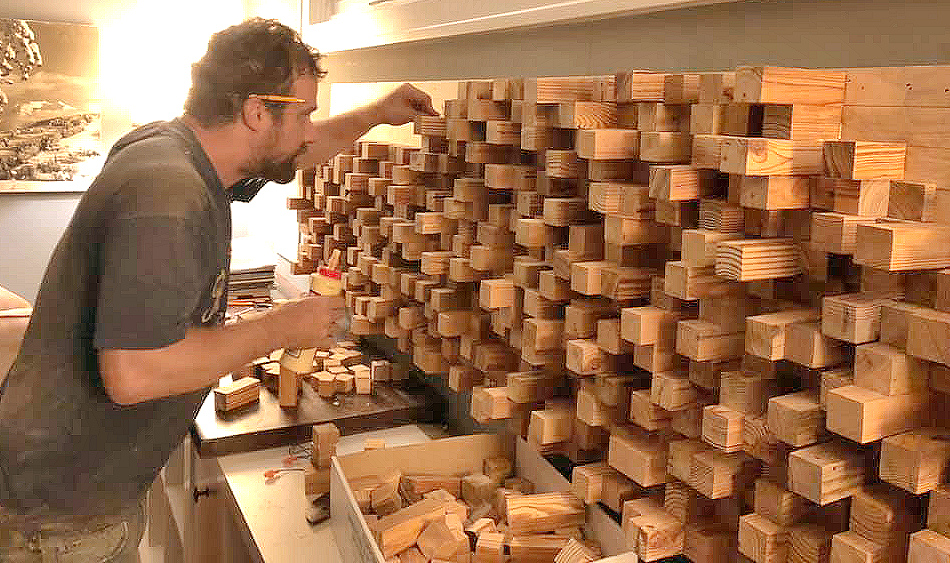 |
| The master himself glues each piece in place |
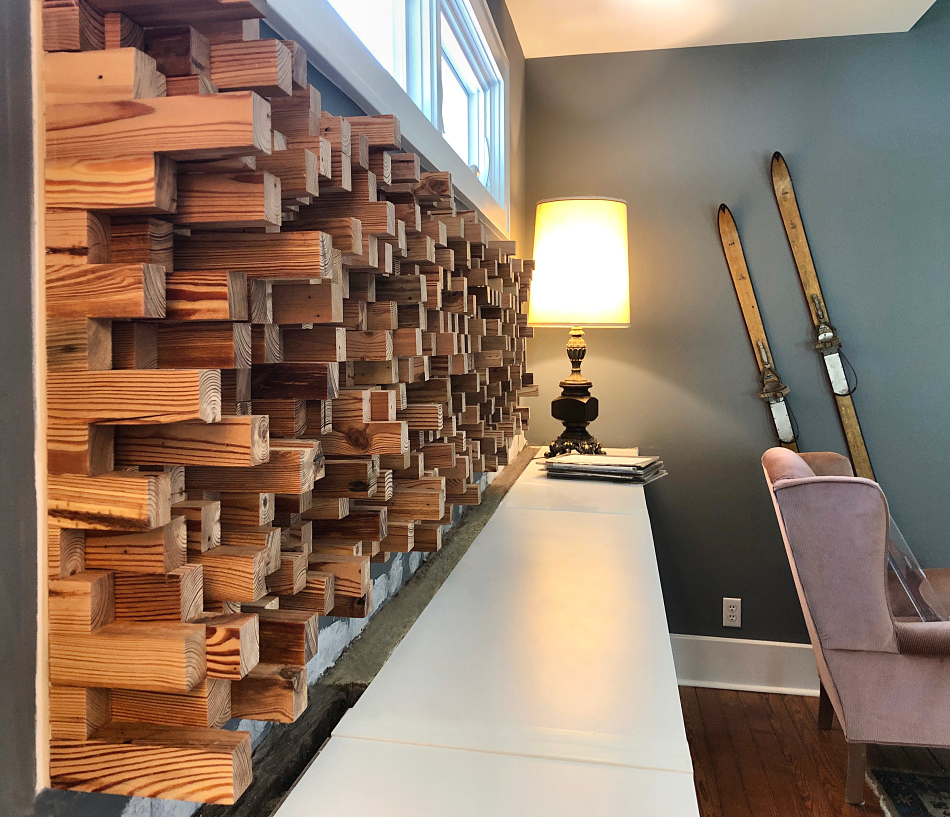 |
| Viewing down the wall from a spot where you wouldn't normally put your eyes |
 |
| The "almost finished" diffusor on the back wall |
 |
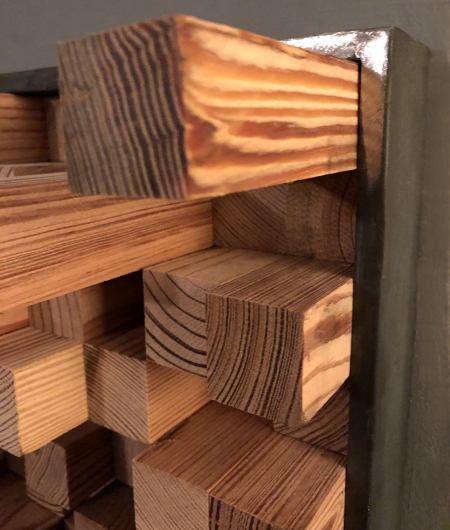 |
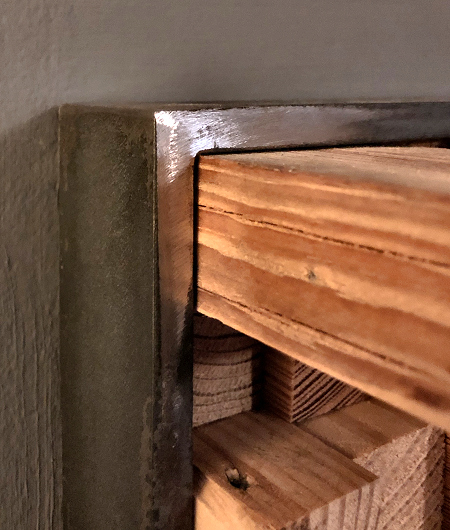
| Two views of the metal frame applied over the diffusor | |
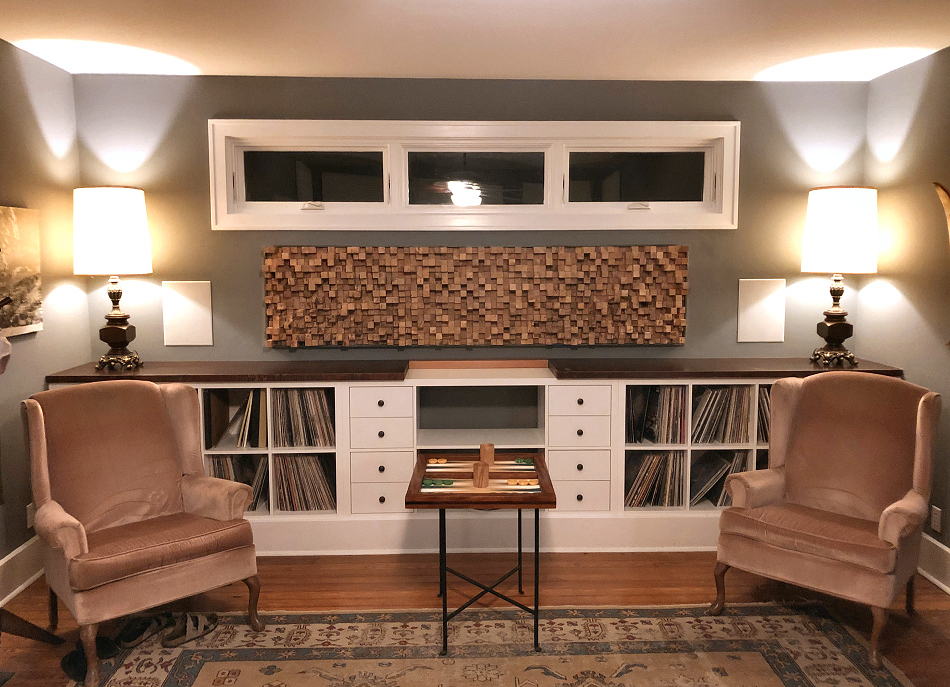 |
| The finished view of the diffusor on the back wall and the new KEF Inwall Ls Rs surrounds. It's a 5.1 system, not a lousy 7.1 system. |
|
|||
| There is no plug-in for experience... | |||
| SOUNDOCTOR BARRY OBER EMAIL: barry@soundoctor.com | |||